Transform Raspberry Pi in hot spot Wifi with captive portal (1/2)
For an automatic install of the hotspot, read this post.
If you want to share your wireless connection but to control who can use it, You can set up a captive portal which will look like what do SFR or Free for example. And ofcourse Raspberry Pi will be able to help us !
So let's first install and configure an access point
- Install tools to compile and install iw
apt-get install gcc make libnl1 libnl-dev pkg-config
- Download iw
wget https://www.kernel.org/ pub/software/network/iw/iw-3.14.tar.gz
- Unpack and compile iw version 3.14 (non ce n’est pas lié au Raspberry 😉 )
tar zxvf iw - 3.14.tar.gz
cd iw-3.14
make
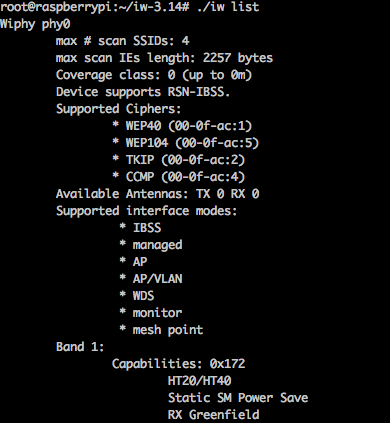
- You can now test if your Wifi dongle supports the Access Point mode
If you have “AP” (Access Point) in the modes supported, It won !
Install the hotspot
- Install different packages for the access point and the portal
apt-get install hostapd nginx isc-dhcp-server iptables iptables-persistent - Configure your key to have a fixed IP on your new network. I chose to define a network on the 192.168.10.0/24. Change the contents of the file /etc/network/interfaces
auto lo iface lo inet loopback iface eth0 inet dhcp allow-hotplug wlan0 iface wlan0 inet static address 192.168.10.1
 netmask 255.255.255.0
 network 192.168.10.0
iface default inet dhcp
- Edit the file /etc/default/hostapd. I do not know why the daemon is not configured correctly, You must add the following line :
DAEMON_CONF="/etc/hostapd/hostapd.conf"
- Now we have to create that famous file /etc/hostapd/hostapd.conf. Use comments to change the settings according to your need :
# interface wlan Wi-Fi
interface=wlan0
# nl80211 avec tous les drivers Linux mac80211
driver=nl80211
# Nom du spot Wi-Fi
ssid=PiHomeServerAP
# mode Wi-Fi (a = IEEE 802.11a, b = IEEE 802.11b, g = IEEE 802.1g)
hw_mode=g
# canal de fréquence Wi-Fi (1-14)
channel=6
# Wi-Fi ouvert, pas d'authentification !
auth_algs=1
# Beacon interval in kus (1.024 ms)
beacon_int=100
# DTIM (delivery traffic information message)
dtim_period=2
# Maximum number of stations allowed in station table max_num_sta=255
# RTS/CTS threshold; 2347 = disabled (default)
rts_threshold=2347
# Fragmentation threshold; 2346 = disabled (default)
fragm_threshold=2346
- You can now start the service hostapd :
service hostapd start
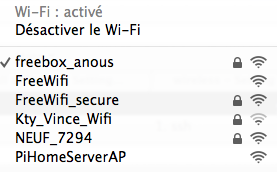
At this point your network should appear in the list of access point. Here you see well PiHomeServerAP in the list of visible networks.
- Next step : enable the DHCP server to send the information to devices that connect to our hotspot. For this you must edit the file /etc/dhcp/dhcpd.conf :
- Then you must edit the file/etc/default/isc-dhcp-server to select the interface on which ca will apply. Replace the last line :
INTERFACES =.""
by :
INTERFACES =."wlan0"
- You can start your DHCP server
service isc-dhcp-server start
- For the moment, your wifi interface is not bound to your ethernet interface. Suddenly you can connect but you will not have access to the internet. It should link the two. First, activate the IP forwarding to your ethernet interface by adding in /etc/sysctl.conf the line :
net.ipv4.ip_forward=1
It will be taken into account at the next boot. For not having to restart you can run the command :
sh -c "echo 1 > /proc/sys/net/ipv4/ip_forward"
- Make the link between the two interfaces :
iptables-t nat-A POSTROUTING-o eth0-j MASQUERADE
iptables-A FORWARD-i eth0-o wlan0-m state--state RELATED,ESTABLISHED-j ACCEPT
iptables-A FORWARD-i wlan0 o eth0-j ACCEPT
- Problem it is not saved. We will therefore retrieve the configuration, and ask its loading on every startup.
Save the configurationservice iptables-persistent save
- And finally to enable the service for the next reboot :
update-rc.d hostapd enable update-rc.d isc-dhcp-server enable
- You can now use your access point or to validate the installation do a restart
You now have an operational wireless access point. The next article will explain how to install and configure a captive portal to control who can use your network.
Sources :


