Raspberry Pi Home Server - Issue on air with PiFm
Now a simple article (Bah yeah it's Sunday !) and quick to set up especially if you already have an electric wire !

I offer this post for a while but between the weather station and the Arduino j’ai pris du retard 🙂
Today we are going to use the tool PiFm, Super simple to set up and use. For this you need only a wire with a length of 20 at least cm. Here is what I took home :

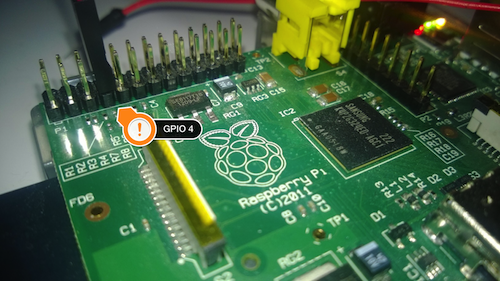
Then you connect on the GPIO 4 which corresponds to the 4th pin on the inside row :
Finally you download this little app PiFm to This address and you unpack everything in the directory of your choice.
wget http://www.icrobotics.co.uk/wiki/images/c/c3/Pifm.tar.gz tar zxvf Pifm.tar.gz
To immediately test it's easy, you have a file included with :
./pifm sound.wav 100.0
The value 100.0 corresponds to the transmitter frequency, that you need to adjust your radio. You should hear the music of a cult film !
Now if you want to make your own music, We'll have to follow the format of 22050 Hz, Mono and 16 bits. To convert your MP3, We will use a classic tool : ffmpeg.
apt - get install –y ffmpeg
Then you take an MP3 and you type the following command :
ffmpeg-i mon_fichier.mp3 - acodec pcm_s16le - ar 22050 -AC 1 mon_fichier.wav
Voilà. You can rerun PiFm with your file :
./pifm mon_fichier.wav 100.0
Have fun !


